Broken Shovel Waterfall – With No Welding!

It’s hard enough to find a use for one broken shovel, never mind six of them. But I did! I made a broken shovel waterfall with them, no welding necessary! Let me tell you how I did it because it is so freaking amazing I hardly believe I made it.

The Idea

We have a problem in my neighborhood with irresponsible dog owners leaving their dogs outside to bark. After 4 years of it I finally called by-law enforcement which has diminished the problem some. The problem is after being annoyed for so long, it’s almost impossible to ignore even reasonable barking.

Planting the hedge was step one in my efforts at noise abatement. But since it will be a few years before the hedge is big enough to pull its weight, I decided a water feature would be step 2. I wanted the tinkle of a water feature to help distract from the barking. Except it had to be unique, it had to be DIY, and it had to be amazing. Nothing I saw on the internet was working for me, and then I remembered those broken shovels!

The Broken Shovel Waterfall

Every waterfall has three main parts. A reservoir or basin of some sort to hold the water, something for the water to spill over, and a pump.

The Basin

I considered using a buried reservoir, but decided a disappearing fountain wasn’t what I wanted. An old galvanized wash-tub would have been lovely but they are rare to find and expensive when you do see them. I’ve seen a shovel waterfall on Pinterest that uses a wheelbarrow, but that wasn’t for me either. In the end I decided on a hypertufa trough.

That was hiccup number one. I had searched on the internet a bit, saw others used hypertufa for water features and assumed all would be well. Except hypertufa is very porous and water would only stay in my trough for a few hours at best. For now I’ve solved that problem by putting the plastic bin I used for my form back in the trough. I painted it gray to make it less obvious – I think I would prefer it black.

The Waterfall

My next issue was how I would support my shovels for the water to spill over them. I considered a few options like old bi-fold doors or building a fake picket fence. My main fear was that if I didn’t choose wisely, my broken shovel waterfall would look like I tried to throw every project ever seen on Pinterest into one. In the end I decided a simple arbor was the way to go.

I dug the holes for the posts on Saturday, despite a heat wave that had the ‘feels like’ temperatures flirting with 100. There were also biting flies, vicious mosquitoes, the stickiest mud I’ve ever seen and a thunderstorm. I got a blister even. But the holes were dug and the arbor assembled.

On Sunday, my youngest helped me get the arbor up. After everything was level, we just tamped soil around the posts. Next was attaching the shovels. It took me a long time to come up with a way to attach the shovels. At one time I considered removing the old handles and replacing them with dowel. Removing the handle from a shovel is not an easy job so I was happy to not need to do that. I used pipe hangers instead, the shovels balance in them perfectly.

I first tried attaching the shovels to the front of the posts. The problem with that was they weren’t long enough to have the water spill from one shovel to the next below.

I solved that problem pieces of 2 x 4 on the back of the post. It works out perfectly and keeps the shovel from listing to the side.

I used pieces of black shelf liner to stabilize and ‘tune’ the shovels so the water would fall from one to the next below.

The tubing needed for the pump was a bit of a disappointment. I hadn’t realized it would be so large and hard to hide. It is attached to the back of the post with zip ties that I stapled to the post.

The pump

I used a pump that was rated for 5 feet of lift. I wish I had gone with the next size down even though it was only rated for a 3 feet of lift. This pump just had too much water flowing through even at its lowest setting. I’ve had the pump since the end of May so there’s no returning it. Rather than buy another pump, I cut a small hole in the hose below the water line. This lets some of the water divert right back into the basin and reduced the flow to a better rate.

Broken Shovel Waterfall

I can’t even tell you how excited and happy I was last night when I finally got everything running and could see that it was really going to work. I just kept saying “My waterfall turned out so freaking cool!” on repeat and annoying my boys.

Here is the space before the waterfall.

And here it is after.

Broken Shovel Waterfall

I think the space is much improved. For now, I have the pump unplugged – everything is just so muddy from the rain and me playing around to get the water flow right. Once the ground dries up some the little bit of splashing won’t be a problem and the plants will love it. Those poor gangly lilies finally have something tall to lean up against. Maybe I’ll be able to find some slightly shorter ones to help balance them out.

What do you think? Would you build a waterfall out of broken shovels?

Loving my Black Stained Deck!

After staining my deck on the weekend it was killing me to wait the two days before putting everything back on it. But the wait is finally over and I think it looks fantastic!

Black Stained Deck

I love the way water beads up on the surface now! It’s such an amazing clean look. No more discoloration from moss and water and I can barely see the gouges from the dog’s toenails. It feels so nice and smooth when I walk out there barefoot. Like any dark surface it does show dusty shoe prints and paw prints, but they are easily swept away.

Pothos glowing against Black Stained Deck

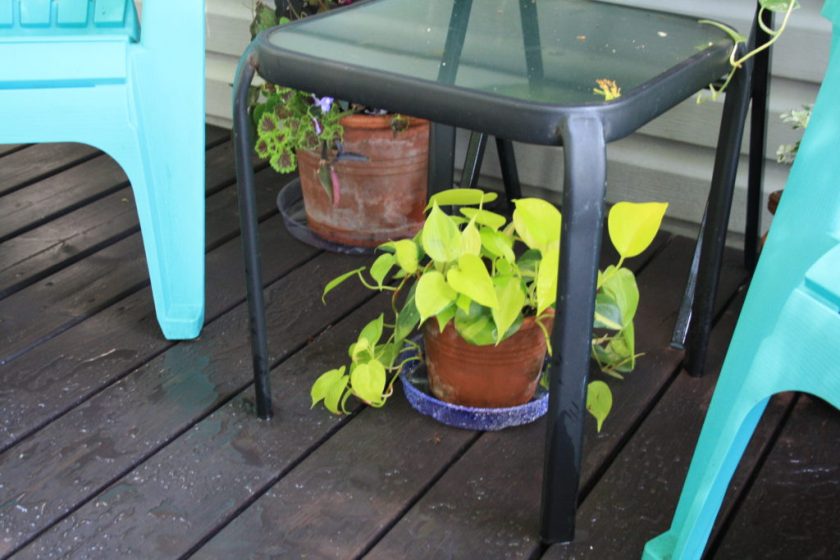
My chairs look amazing and cheery against the black stain and look how bright my pothos looks.

Planter Grouping

All of Mr. Toads hidey-holes are back in front of the patio door where he hangs out. The white flowers of begonia ‘Santa Barbara’ show well against the black stain. It’s a begonia to watch for next year – perfect for hanging baskets and planters.

Tradescantia

This is a variety of Tradescantia I really like – I’ll be over wintering some of that for next spring.

Begonia 'Funky' - Available 2017

In the pink planter is Begonia ‘Funky’, another new variety that will be available next spring. It has a coral tint to it and is very pretty.

Silver & Green Planter

My Silver & Green planter also shows well against the black stain. I will probably leave it much as it is when I bring it in for the winter. Most of the plants in it are houseplants.

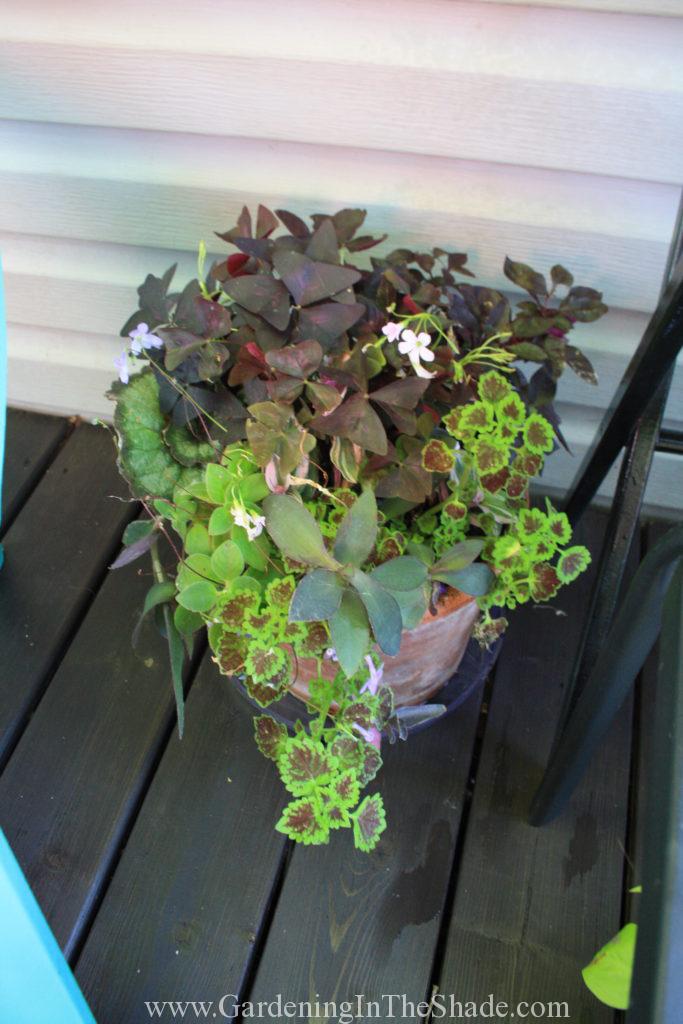
Purple and Lime Planter

This purple and lime planter has plenty of room between the chair and my floral painted table. All of the little pots of houseplants are up there now, leaving room on the glass-topped table for coffee, tea or a drink.

Furniture Sliders

I attached furniture glides to the bottoms of my Black & White planters. It lifts them off of the deck boards just enough for good air-circulation under the pots, which is beneficial for both the plants and the deck.

Attached to bottom of large planter

All of my planters now have something under them especially that pink pot. It has a very rough bottom on it and has already made a mark. Staining the deck may not have been as much work as I thought it would be, but I still want it to stay nice for as long as possible.

Black and White Planter

You can see how nicely the planters have filled in since I planted them at the end of may. You can also see under the pot the one spot where the pink pot left a mark. It could also be because that area is right next to the barbecue, maybe there was grease there I didn’t notice.

Black Stained Deck

My deck is right next to my driveway, so it’s the first thing I see when I pull in, and I love it more every time. All that’s left to do is make cushions for the chairs and the last bit of staining in front of the other door. We have sorely needed rain in the forecast, so I won’t finish the rest of the stain until the weekend.

If you enjoyed this post, don’t forget to share it with your friends! For more just like it follow me on Pinterest, Facebook and Twitter or sign up for regular updates by email.

If you have ever thought about starting a garden or craft blog of your own see how easy it is >>here<<.


Save

Save

Save

Save

Save

Save

Save

Stain Your Deck in One Weekend

Have you ever spent hours thinking about a project, trying to talk yourself out of it because you’re convinced it will be too much work? Well that’s exactly where I was at on staining the deck or not staining the deck.

My Deck - Before Washing

This is how my deck looked Thursday evening. My dad built my deck around 2002 or 2003. Before that most of it was the deck surrounding my parents above-ground pool for 15 or 20 years. Those boards are old!

Being under trees and heavily shaded, it’s always been an annual chore to clean the moss and slime off of the surface. I clean it with the power-washer every year and on my hands and knees with a scrub brush and bleach every other year. Still, I was drinking deeply of the whole ‘let it age naturally, its pressure treated’ and ‘old grey wood looks great!’ Kool-Aid.

As a child of the 70’s, I also have a bit of a mental block over stain. Back then, every single piece of outdoor wood was either ‘redwood’ or ‘cedar’. Neither of them looked the least bit natural, and both are what immediately comes to mind when I think of stain.

Last year I started thinking how much stain would spruce up that old wood. This spring I was thinking even harder about it. But I was also worried about the upkeep of stain. I know even the best stain in the world isn’t going to last forever, and I did not want to add another annual chore to my spring.  So I cleaned the deck, on my hands and knees with bleach and laundry detergent to get the slime off. Then I hit it with the power washer.

Deck after scrubbing

It still looked like shit. Since stain was looking better by the minute, I asked at the hardware store if I needed to sand the deck down before staining it. They advised me that as long as it was clean, I could stain it without sanding it first. Just to be on the safe side, I grabbed a package of 60 grit sandpaper for my little palm sander.

Sanding the Deck

Sunday morning, I went outside for my morning coffee and smoke, still in my sleepwear of leggings and a t-shirt. Everything from the deck was still sitting off to the side of the yard and the deck was empty. I kept looking at that deck and the sander that was out from the night before.

Getting Started - preparing to stain the deck

Halfway through my first cup of coffee, I grabbed the sander and started sanding. And just like that, I started a job I was trying to avoid. I kept my expectations realistic. Rather than try for like new smooth, I just leveled out the grain a bit.

Completely sanded

Two hours and two cups of coffee later, I finished sanding**. Or at least up to the other door. I decided to leave that area for next weekend so we could still get in and out. You can see how beat up the wood is from the dog’s nails. They have their own little version of the ‘Tokyo Drift’ they use when they’re rough-housing.

Sawdust covered 'pajamas'

This is what my ‘pajamas’ looked like after I finished sanding. Next came the real moment of truth.

Staining the Deck

Commited to staining the deck

Once that brush hits wood, it’s commitment time! I was now staining the deck whether I wanted to or not.

First Coat of Stain Finished

Here it is after I finished the first coat. By this time I was really getting excited to see how it would look finished.

Damn Birds!

Those damn birds just won’t give me a break.

Poster Board to keep the stain off of the siding

As I worked my way across, staining the deck, I used a piece of craft or poster board – the foam core kind – to keep the stain off of the siding. I also kept a damp rag handy, good for misses with the brush and continued bird shit episodes.

Deck Stained Black
The truck you see in the background? Last year I had numerous parts of it on my deck for most of the summer.

Here it is after the second coat. That one board at the bottom of the steps is terrible to reach – I may have to take it off to get it fully stained. That big huge job I was dreading, knocked off in time for grocery shopping and dinner! Except for the cleaning and waiting until the wood dried from that, I sanded and stained the deck, or most of it, in one day!

Black Stained Deck from Front Corner

Now I just have to finish that last section – a chore for next weekend. After that, it’s time to add a skirt to the deck and railings. Originally I wanted the deck left open for the view of the lake, but since I have no control over what neighbors do on their own property the view is no more. Now I need railings to fully enclose the yard for the very big, very scary German Shepherd who lives here.

I may also have a little surprise up my sleeve if all goes according to plan. If it doesn’t come to fruition this year, it will next year. 

Tools and supplies used to stain my deck

I used 60 grit sandpaper and my orbital palm-sander to sand the deck and a wide short-bristled stain brush for the staining. I also used a foam brush for any tight spaces and will probably go back over the ‘in between’ spaces with a foam brush to get better coverage on the sides of the deck boards. I worked the stairs from top to bottom. I worked the top one board at a time, staining the full length of each before working my way back to the other side. So from left to right on one board, and then from right to left on the next. Working it that way was a bit easier on the knees.

The stain I used is a semi-transparent Rona brand stain. The color is black onyx, it’s the same stain I used for my Fretwork Garden Fence. Somehow I got very lucky when I bought it, because someone had already had two 4 liter cans (close to two gallons) mixed and then reconsidered. At $20 each, I grabbed both of them. The completed part of the deck is 8′ by almost 16′ and it took the better part of one can for two coats. That wood was thirsty!

Mr. Toad

According to the recommendations on my stain, I will need to wait one or two days before moving my furniture and plants back to the deck. Mr. Toad is very anxious to have his hidey-holes back.

**Before sanding pressure treated wood, take the time to research all necessary safety pre-cautions. If you aren’t sure whether it’s pressure treated or not, play it safe and assume it is.

Question

If you were adding a skirt to this deck, would you build it out even with the edges of the deck or would you recess it using the existing 4 x 4 support posts?

If you enjoyed this post, don’t forget to share it with your friends! For more just like it follow me on Pinterest, Facebook and Twitter or sign up for regular updates by email.

If you have ever thought about starting a garden or craft blog of your own see how easy it is >>here<<.


Save

Save

Save

Save

Save

Save

Save

Save

Save

Save

Save

Fretwork Garden Fence

Fretwork Garden Fence

Perseverance really does pay off, and I am so happy with this little fretwork garden fence I built this weekend.

Fretwork Garden Fence Close

It was probably not the best project for this novice at DIY to start with, but I really am happy with how this second attempt at the idea turned out!

Fretwork Corner Garden Fence
My first attempt was a complete failure.

After last weekend’s complete failure at building a garden fence you would think I’d just give up, but I still couldn’t get the idea of making this fretwork garden fence out of my head.

I went back and read the instructions for the fretwork folding screen that inspired the idea, and they called for 2 1/2″ screws.

After pounding post in
I really should have read the instructions!

On last weeks failure I used 2″ screws, which might explain why nothing was holding together. So this weekend I figured since I still had a pile of 2 x 2’s leftover I would try it again – with the right screws and glue for good measure.

Fretwork Garden Fence
The dogs will be munching on my calibrachoa again.

I also made a few changes to the measurements. The fence is shorter and the center squares are just a bit smaller. In order to avoid having a post where my eaves trough drains, I am keeping it as two separate sections.

I convinced myself that I just needed to take my time and it would work. And it mostly did, but it took most of the weekend to complete one section and partly assemble another one. Granted most of that was the sanding, but this was still definitely not a quick project.

Lumber Cut
Halfway through cutting my pieces I finally figured out that if I cut each piece more slowly there were less splinters on each cut.

Friday night I cut my pieces and started sanding.

Sanding

And sanding and then sanding some more.

All Pieces Stained
Stain isn’t so different than paint – it really does need that second coat to look nice.

On Saturday I finished sanding every piece and then stained all the wood. After my first attempt at using stain last weekend, I am fully sold on staining wood before assembling it. I kind of want to stain my deck now too.

After seeing how pretty the stain looked, I was so excited to start putting everything together I hardly slept Saturday night. I just couldn’t wait for morning to get started.

Center Square Pieces

I attached all of my 4″ pieces first. I used some scrap pieces to brace against and keep everything uniform.

Center Squares assembled

And then I assembled all the middle squares. Which is when the crap hit the fan. It seems someone (me) cut all the 4″ pieces at 4 1/8″, which across the width of the panel adds up to 1/2″. It was enough to really cause a problem, and problems on no sleep are not cool. If everything had been measured properly, or at least checked and fixed before starting to put it together, I probably would have finished both sections today. Maybe I’ll get the next one put together one night this week.

Tools Used:

  • Orbital Sander
  • Miter Saw
  • Impact Driver
  • Drill

Materials:

  • Glue
  • 2 1/2″ Screws (attach the two 4″ pieces to the center upright last – they are the only ones that have to be driven in at an angle)
  • 2 x 2 x 8″ lumber. I lost track of how many on this second attempt, I think it took 7 for two sections. I used spruce, but would look for something better if I were to do it again. Whatever I saved in cost, I wasted in time sanding.
Garden Fence Panel
Don’t forget to add whatever length will be in the ground to each end piece!

Fretwork Garden Fence

After spending two weekends on this idea it’s so nice to have something I’m happy with!

If you enjoyed this post, don’t forget to share it with your friends! For more just like it follow me on Pinterest, Facebook and Twitter or sign up for regular updates by email.

If you have ever thought about starting a garden or craft blog of your own see how easy it is >>here<<.


Save

Save

Save

Save

Save

Save

Save

Save

Save

Save

Save

Save

DIY Fence Fail


Fretwork Corner Garden Fence

I spent the weekend making these two sections of a fretwork garden fence. I came up with the idea when I saw this really pretty DIY Geometric Fretwork Screen made from 2 x 2 lumber while scrolling through Pinterest.

Sidebed front corner 2

Last year I put in this cheapy wire fencing that I always think of as ‘granny’ fencing to try to keep the dogs from stomping all over my plants and eating them. It didn’t really work that well, because both dogs just hopped over it when they wanted to graze, or avoid walking in the grass, or (I’m looking at you Louie!) to poop on my plants.

They’ll happily run through a muddy ditch, but wet grass must be avoided at all cost!

Over the winter, cats being cats and dogs being dogs, my retriever managed to get one section hooked in his collar. He was the sorriest looking dog ever standing at the bottom of the stairs with 26 feet of wire fencing trailing behind him.

So that’s gone.

Ever since my perennials started popping up this spring, I’ve been weighing (and pricing) different options to add fencing to my flowerbeds. I can’t keep hollering “Get off my flowers” every 5 minutes, it’s like trying to keep toddlers from eating sand. Except everything is either not to my taste or completely out of my price range.Fretwork Garden Fence When I saw that folding screen I instantly visualized the look as fencing and worked up a rough plan based on 2 foot increments – one side of the bed is 24′ long, the other 26. Sketching up my own plans was probably my first mistake.

Miter Saw, Tape Measure and Beer

For tools I have a miter saw, an orbital palm sander, and a drill, along with the use of my son’s impact driver (That impact driver is amazing!) and that’s pretty much it, or at least all that was useful for this project. By the end of the weekend it was pretty obvious I really needed to have a table saw and a nail gun. Better plans too.

Fretwork Garden Fence Cut Lumber

I did a quick sanding of all of my lumber before using it because 2 x 2’s or at least the cheap spruce 2 x 2’s are usually pretty shitty and they have a stamp in the middle along with blue ends. Once I cut all the pieces, I sanded off any splintery ends.

Fretwork Garden Fence Assembly
I swear the next time I have my power washer out, I’m really going to offer to clean my neighbors siding for them. It’s looked like that for about two years now.

Then I started putting it together and I was kind of excited to see it starting to look almost like I had pictured it, until it wasn’t.

It was flimsy, and barely holding together. I honestly couldn’t picture it working at all as it was.

Painted Zinc Mending straps

So back to the hardware store, I bought some of those metal straps and corner brackets they sell and spray painted them black. Those straps add up pretty quick and bumped the price of two 4′ fence segments from around $20 closer to $50.

Originally the idea was to pound each post into the ground since they were only 2 x 2’s.

After pounding post in

Apparently that wasn’t a good idea either. If that had happened before I stained it, you would be looking at pictures of raw spruce 2 x 2’s.

This was my first time using stain and I know it looks horrible, but honestly I can’t even be bothered to try to fix it. The fence is just not going to work. For now it might keep the 80 lb adolescent German Shepherd from sitting on my sedums, but I can’t see it surviving a winter.

Nor can I see myself using this plan to finish fencing in both sides of the bed. Not only is it too rickety, it’s too tall. I think it would look better if the bottom rail were only 6″ off the ground. Plus if I have to use the pieces of metal all the way along, not only are they ugly (I can see them from my deck) but they’re expensive.

Do I still want a fretwork garden fence?

I still love the idea of how it could look. So I’m wondering if doing a few things differently would make it actually work.

Things like buying say 2 x 6, or 2 x 8’s and ripping them lengthwise so that I’m starting with better lumber.

Fretwork Garden Fence Alternate Plan

And things like altering the plans so the top and bottom rails were one single length instead of butting against that vertical piece in the middle or even using 4 x 4’s for the posts and 2 x 4’s for the top and bottom rails.

Definitely every place the pieces cross should have a dado so they can cross and be nailed together. And the spacers should carry through the center of the inside square instead of using the fiddly 3″ pieces I used.

Another thing I would need to do is account for the posts at each end in my measurements or find myself with an odd sized panel at the end of the run. Since I didn’t do that with the first sections, maybe it’s a good thing it didn’t work out enough to finish the garden. I would have ended up with a section roughly 9″ narrower than the rest of the fence sections at the end.

In its own way, learning how to work with lumber isn’t much different from learning how to sew. You get better at planning and measuring. Eventually you acquire more of the tools you need to do the job better or faster and sooner or later you either learn to sew or build stuff that looks good and works.

Or you find another hobby and buy the things you need.

In the meantime, for what I spent on lumber and hardware this weekend, I could have fenced the whole thing in granny fencing again. Heck, I could have even splurged on the 3′ tall stuff instead of the 2′ tall I used last year.

Save

Save

Save