Someday Dreams and my Vintage Coffee Bar

Pending Projects

At the start of the weekend I was feeling very discouraged because I haven’t completed a single project this week. Not one. Instead I’ve created a bunch of pending projects for myself.

Stack of old fence boards

There was this pile of used fence boards purchased on Monday. My plan is to pull all the nails, clean them up and stain them. Once that’s done, I’ll use them to add a skirt to my deck. The area underneath the deck is visible when approaching my house and it isn’t a view that puts our best face forward.

Rusty Butterfly Chair Frame

Then on Friday I made a trip to Picker’s Pig Pen, where I found this rusty Butterfly Chair frame. I’ve already cleaned up the frame and painted it, but there is still the cover to sew.

Future small sitting area

Eventually I will create a small sitting area under this willow tree. It’s a perfect place to sit and admire the work that has already been done. The finished Butterfly Chair will go there. Replacing the German Shepherd’s kiddie pool with a natural looking smallish pond is just one of my someday dreams.

Old Shovels

I can’t imagine anyone other than a fellow blogger appreciating the value in this bucket of old shovels. Now I just need someplace to stash them away until inspiration hits. Storage at my place is scarce, a garage, workshop, or even just a shed of my own, is another of my someday dreams.

My Mother’s Garden

On Saturday, I went to the Blenheim Cherry Fest with my mother and Aunts and their cousins. I picked my mother up at her house and took a few pictures while there.

Begonia Pegasus with Dragon Wing Pink

This planter has PW’s Begonia Pegasus along with some Pink Dragon Wing begonia. It’s value is primarily for those pretty leaves, and with a pair of them on either side of her door, this planter combo is very attractive.

Hosta Bed at my Moms (2)

The pictures above and below are of just one of my mother’s Hosta beds. My father built the little bench for her out of scrap lumber. It would be easy to build your own. In my opinion, benches and other places to sit are a very important part of any garden. They anchor garden beds while giving them a purpose, plus it’s a great reminder to avid gardeners that they need to occasionally sit and admire what they’ve created.

Hosta Bed at my Moms

For anyone who thinks shade gardens or even Hosta themselves are boring, I would have to argue that they simply haven’t explored the huge variety of leaf colors, textures and sizes that are available in Hosta. Plus they haven’t seen what my mother can do with them.

Blenheim Cherry Fest

At the Blenheim Cherry Fest we went to an Art in the Garden event. The gardens themselves were lovely.

Hosta Golden Tiara

I was quick to spot this Golden Tiara Hosta.

shady garden with old fashioned pedestal sink

The old-fashioned pedestal sink complete with faucet made an interesting statement in this bed.

Tic-Tac-Toe

Most of the pathways were found bits of old concrete with plenty of benches and areas to sit placed here and there. On some of the benches, there were these handy tic-tac-toe boards. I doubt many ever intend to play tic-tac-toe, but I bet it gets used as people sit and enjoy the gardens around them.

A must see artist website

I really hope you’ll take a minute to click on this next link – Alishia Ellis creates beautiful art that I felt would be unethical for me to photograph. I stood in her booth and admired her stunning work until my Aunt dragged me on. As much as I would love to own one of her pieces, my house is not fine art friendly at this time.

Vintage Coffee Bar

Vintage Cabinet

Indoors there were antiques and treasures on display, I fell in love with this vintage buffet. Thanks to my wonderful Aunts, it came home with me.

Buffet turned vintage coffee bar

It’s perfect as a coffee bar with my vintage canisters on top. I love using that wicker basket for our to-go cups. They are tall and so tippy that without the basket, it’s hard to contain them.

vintage coffee bar drawer pull

Check out the chrome drawer pulls. They really are in beautiful condition.

vintage coffee bar chrome legs

And really, when have you ever seen anything sexier than those chrome legs?

Vintage glassware (2)

The space behind the sliding doors is perfect for storing my collection of vintage green glassware. Does anyone else have a vintage chip and dip bowl? They are genius for serving nachos and salsa, I try to use mine when my friends are over for cards and tea.

Vintage Coffee Bar

Those are my ‘company’ mugs. The design is partly in silver so I refuse to put them in the dishwasher or have them disappear into the boys rooms. There is plenty of space behind the etched glass to store my everyday coffee mugs too.

vintage tea towels

The one drawer gives me a place to stash my handful of vintage tea towels. I’m reluctant to use them, even if they are nicer than anything you can buy today.

vintage buffet drawer perfect for tea

This drawer makes handy storage for our flavored teas. You cannot imagine how much counter and cupboard space this beauty has freed up in my tiny kitchen.

Vintage buffet counter detail

I love the aluminum edging. This is how they used to make counters and while granite counters are what most people want, I prefer this vintage look.

My kitchen table and chairs

I’m feeling a need to polish the chrome on my kitchen set now. My mother got it for me at an auction and recovered it 14 years ago. It’s starting to show some wear and tear with the missing upholstery nails, but I still love it.

It’s time to get off the computer and look after yesterdays undone chores. Have a fantastic Sunday!

If you enjoyed this post, don’t forget to share it with your friends! For more just like it, follow me on Pinterest, Facebook and Twitter or sign up for regular updates by email.

If you have ever thought about starting a garden or craft blog of your own see how easy it is >>here<<.

Save

Save

Save

Save

Hosta ‘Sun Power’

Hosta Sun Power

I’ve had Hosta Sun Power for a several years, but for one reason or the other, never under ideal conditions.

06-07 Corner Begonia Bed

Last spring, I divided my clump and planted it in the raised corner bed to provide a backdrop for my Santa Cruz and San Francisco begonia.

Hosta Sun Power with Begonia and Ferns

Here is the same bed a year later. You can see how rapidly Hosta Sun Power is filling the space. A mature Sun Power has a spread of up to 5 feet so one clump will fill most of the awkward to reach back corner of this bed.

Hosta 'Sun Power'

The foliage on Hosta Sun Power is high impact with its bright chartreuse to gold color and slightly rippled leaf edges.

Hosta 'Sun Power' Leaf

No margins or variegation on these leaves, Sun Power makes a showy statement without them.

Hosta 'Sun Power' Flower

Mine are in flower with pretty spikes of pale lavender or orchid colored blooms.

Hosta Sun Power at a glance:

Height:

Sun Power when mature will reach heights of 27-29 inches or 70-75 cm

Spread:

Sun Power will spread out to 47-59 inches or 120-150 cm so be sure to give it lots of space in your garden.

Vigor & Size:

Hosta ‘Sun Power’ is a large-sized hosta. It’s size, spread and gorgeous sunny color make it an excellent choice for background plantings in your garden

Foliage Color:

Large leaves are slightly twisted giving a ripple-effect to the edges. Leaf color ranges from chartreuse to bright gold, and for best color this hosta likes a bit of morning sun.

Flower Color:

Flowers are a pale orchid or lilac color on 36″ scapes.

Hosta Sun Power is perfect choice for bright sunny color in shade to part shade gardens so be sure to pin it for your wish list.

If you enjoyed this post, don’t forget to share it with your friends! For more just like it, follow me on Pinterest, Facebook and Twitter or sign up for regular updates by email.

If you have ever thought about starting a garden or craft blog of your own see how easy it is >>here<<.

Save

Save

Save

Save

Save

Save

Cheap and Easy Outdoor Chair Cushions

Outdoor Chair Cushions
Make outside chair cushions on the cheap with economy pillows and a fabric shower curtain!

Spring is for planting and gardening, but summer is for kicking back and appreciating the beauty I’ve created around me. Which is why I’ve spent the past couple of weeks on deck projects. I spend a lot of time sitting out there, so I wanted to spruce things up a bit. I really wanted to add some outdoor chair cushions this year.

Outdoor chair cushions have always been a bit of a dilemma for me. My deck is not covered, so anything out there gets exposed to the weather. Along with weather comes bird and spider poop. Plus if I even remembered to bring them indoors, I’ve really got no place to put them.

Practicality aside, I still wanted them and a couple of weeks ago I even had two outdoor chair cushions in my cart, but decided that 2 for $30 wasn’t enough of a bargain for me. My choices were limited because everything was already picked over. I needed two that matched and would look good with my chairs which limited my choices even more.

Why finally splurge only to ‘settle’ when I knew I could make my own?

What I used instead:

Chair Cushion Pillows

In the bedding department I found these pillows for $3.47. They might be way too soft for sleeping, but they’re perfect for my patio chairs and I could choose my fabric for the cover. If they’re still usable when summer is over, I can swap out the cover and use them on my couch so storing them isn’t a problem. If they end up being garbage at the end of the summer, even my cheap little heart won’t cry over the seven bucks they cost.

Chair Cushions Fabric Contendors

I had these fabrics at home that would have worked, but the only one I had enough of to really use was the bright green. Bright green and aqua wasn’t the look I wanted to go for. The other two fabrics were really too expensive to use on outdoor projects.

Chair Cushions Fabric

Wal-mart only carries pre-cut quilting fabric and anything that I liked, wasn’t enough fabric for two pillows. So I used plan B and headed for the bedding department again to look at sheets and curtains, anything that would yield a big enough piece of fabric. I found this fabric shower curtain on the clearance rack for $15 and the colors were a perfect match for my chairs.

Making the Covers

Making a pillow cover is one of those simple easy jobs I kind of enjoy. It’s just measure, cut, and sew. There aren’t any any intricate cuts or high precision sewing to worry about. The only part of making these I didn’t enjoy, was the piles of mending my boys tried to foist on me when they saw the sewing machine come out.

Chair Cushion Fabric Pieces (2)

I went for a straight-forward envelope back with a 2″ overlap and no buttons or fastenings. I also left off any cording. It gives cushions and upholstery a more defined look, but it is an extra step plus the messing around to get nice corners. I also used the existing hems at the top and bottom of the shower curtain to simplify these covers even more.

My pillows measured 20 x 26″, so for each pillow I cut a 21 x 27″ front (1/2″ seam allowances times 2), and for each back I used two pieces, one 16.5 x 27″ and one 12.5 x 27″, adding in 2″ of overlap and 1/2″ seam allowances. Remember my pieces were already hemmed, if I were to hem them, the length for each with a 1″ hem plus a 1/2″ turn under, would have been 18 and 14 instead.

Chair Cushion wrong side

Then I just stacked my pieces right sides together and sewed around the four sides using 1/2″ seam allowances.

Chair Cushions clipping corners

I clipped the seam allowance close to my stitching at the corners and then turned them right-side out. The fabric is synthetic and I didn’t iron it, mainly because I am positive it would melt before it held a crease.

My finished outdoor chair cushions


Outdoor Chair Cushion on Chair

So there you have it, two outdoor chair cushions for around $11 each. That $15 shower curtain could have easily covered a third pillow, and with some finesse maybe even a fourth.

Chair Cushions on Deck

The fabric goes so nicely with the chairs. By happy accident, the design placement on the fabric is nearly identical on each cushion.

Cushions just seem to make the space friendlier don’t they?

If you enjoyed this post, don’t forget to share it with your friends! For more just like it, follow me on Pinterest, Facebook and Twitter or sign up for regular updates by email.

If you have ever thought about starting a garden or craft blog of your own see how easy it is >>here<<.


Save

Save

Save

Save

Save

Save

Save

Hosta Golden Tiara

Hosta Golden Tiara

Hosta Golden Tiara with its tidy heart-shaped leaves and compact height of just 15″ is one of my favorites in the garden.

Hosta Golden Tiara
One year old clump of Hosta ‘Golden Tiara’

The picture above is a one year old clump, it will eventually reach a spread of up to 35″ making it an excellent choice for borders. To see an example of mature Hosta ‘Golden Tiara’ used as a garden border click here.

Hosta 'Golden Tiara' leaves

Hosta ‘Golden Tiara’ has medium green leaves with chartreuse margins. When grown in sun the margins will become more gold-colored. Light purple flowers will appear mid-summer, they are darker when Golden Tiara is grown in sun.

Hosta Golden Tiara at a glance:

Height:

Golden Tiara when mature will reach heights of 12-16 inches or 30-40 cm

Spread:

Golden Tiara will spread out to 29-35 inches or 75-90 cm so be sure to give it some space in the garden.

Vigor & Size:

Hosta ‘Golden Tiara’ is a medium-sized hosta. It’s size and spread make it an excellent choice for garden borders but it is also suitable for container growing.

Foliage Color:

Heart shaped leaves have a medium green center with a narrow chartreuse edging. Edges will become more of a gold color when grown in sun.

Flower Color:

Flowers appear mid-summer on 24 inch scapes. They are lilac or light purple, but darker when grown in sunnier locations.

If Hosta Golden Tiara isn’t already a part of your shade garden it would be an excellent addition, so be sure to pin this one for your wish list.

If you enjoyed this post, don’t forget to share it with your friends! For more just like it, follow me on Pinterest, Facebook and Twitter or sign up for regular updates by email.

If you have ever thought about starting a garden or craft blog of your own see how easy it is >>here<<.

Save

Save

Save

Save

Loving my Black Stained Deck!

After staining my deck on the weekend it was killing me to wait the two days before putting everything back on it. But the wait is finally over and I think it looks fantastic!

Black Stained Deck

I love the way water beads up on the surface now! It’s such an amazing clean look. No more discoloration from moss and water and I can barely see the gouges from the dog’s toenails. It feels so nice and smooth when I walk out there barefoot. Like any dark surface it does show dusty shoe prints and paw prints, but they are easily swept away.

Pothos glowing against Black Stained Deck

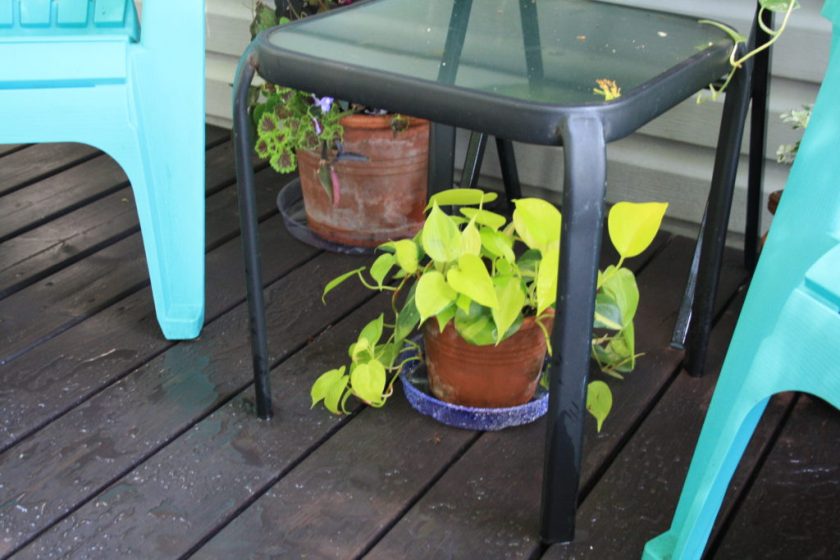
My chairs look amazing and cheery against the black stain and look how bright my pothos looks.

Planter Grouping

All of Mr. Toads hidey-holes are back in front of the patio door where he hangs out. The white flowers of begonia ‘Santa Barbara’ show well against the black stain. It’s a begonia to watch for next year – perfect for hanging baskets and planters.

Tradescantia

This is a variety of Tradescantia I really like – I’ll be over wintering some of that for next spring.

Begonia 'Funky' - Available 2017

In the pink planter is Begonia ‘Funky’, another new variety that will be available next spring. It has a coral tint to it and is very pretty.

Silver & Green Planter

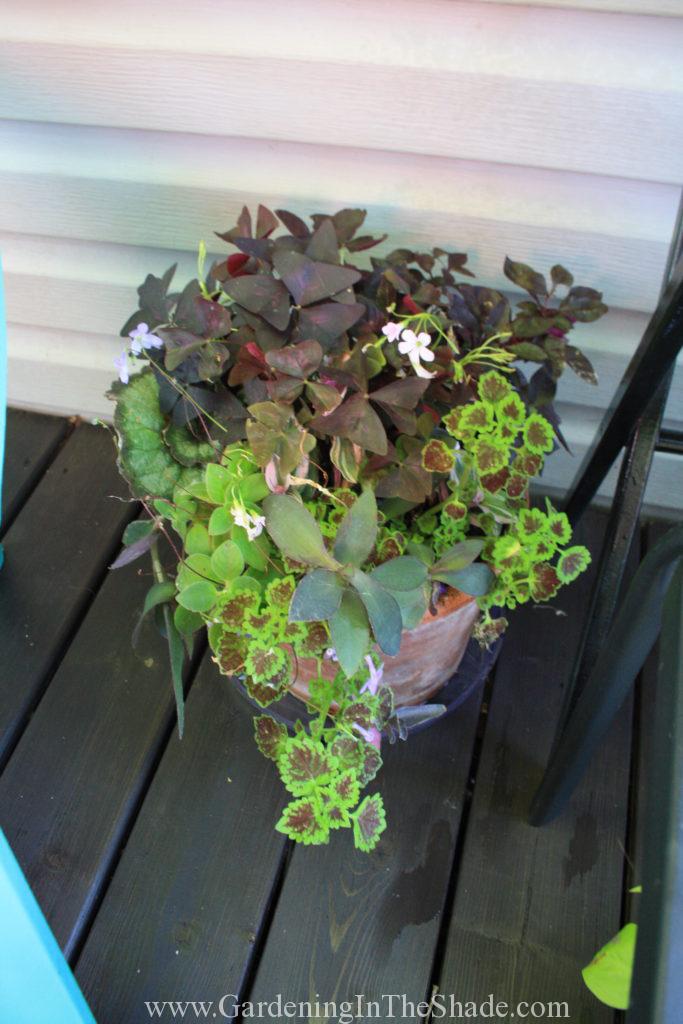
My Silver & Green planter also shows well against the black stain. I will probably leave it much as it is when I bring it in for the winter. Most of the plants in it are houseplants.

Purple and Lime Planter

This purple and lime planter has plenty of room between the chair and my floral painted table. All of the little pots of houseplants are up there now, leaving room on the glass-topped table for coffee, tea or a drink.

Furniture Sliders

I attached furniture glides to the bottoms of my Black & White planters. It lifts them off of the deck boards just enough for good air-circulation under the pots, which is beneficial for both the plants and the deck.

Attached to bottom of large planter

All of my planters now have something under them especially that pink pot. It has a very rough bottom on it and has already made a mark. Staining the deck may not have been as much work as I thought it would be, but I still want it to stay nice for as long as possible.

Black and White Planter

You can see how nicely the planters have filled in since I planted them at the end of may. You can also see under the pot the one spot where the pink pot left a mark. It could also be because that area is right next to the barbecue, maybe there was grease there I didn’t notice.

Black Stained Deck

My deck is right next to my driveway, so it’s the first thing I see when I pull in, and I love it more every time. All that’s left to do is make cushions for the chairs and the last bit of staining in front of the other door. We have sorely needed rain in the forecast, so I won’t finish the rest of the stain until the weekend.

If you enjoyed this post, don’t forget to share it with your friends! For more just like it follow me on Pinterest, Facebook and Twitter or sign up for regular updates by email.

If you have ever thought about starting a garden or craft blog of your own see how easy it is >>here<<.


Save

Save

Save

Save

Save

Save

Save